Practical Windows guide
How to take a screenshot with the mouse cursor on Windows 11
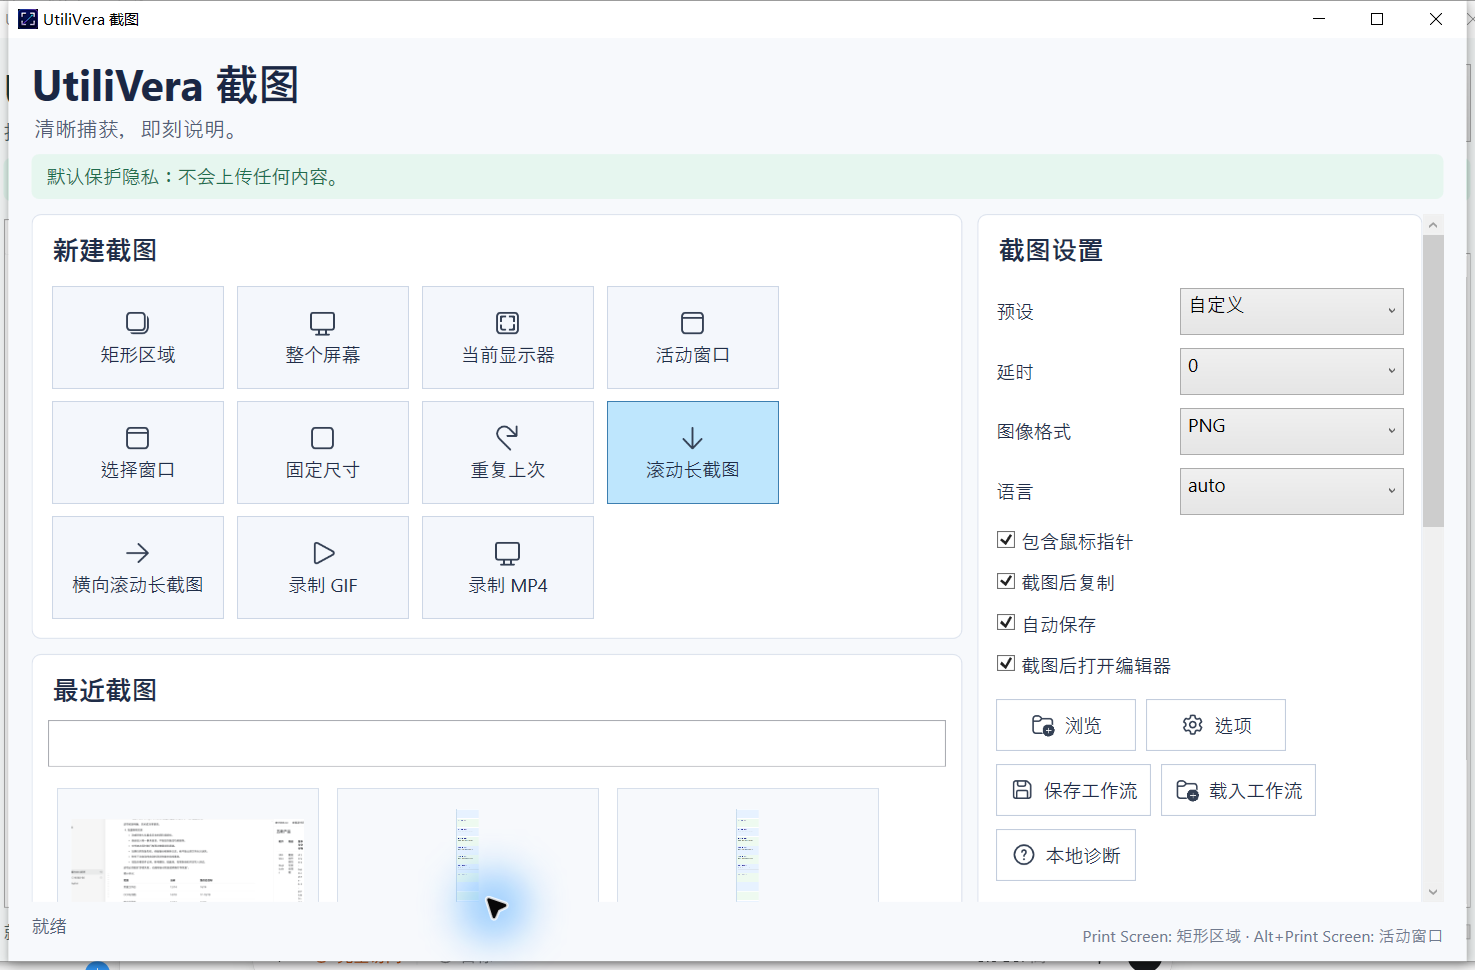
Use Snipping Tool when you do not need the pointer. Use the deprecated Steps Recorder only when its annotated sequence is still available and acceptable. For a normal region or window screenshot that must keep the pointer, enable Include cursor in UtiliVera Capture, set a delay if needed, place the pointer beside the target, and verify the exported PNG at 100%.
Public · unsigned · Keyword focus: screenshot with mouse cursor Windows 11Keep the mouse pointer visible in a Windows 11 screenshot. Compare the built-in workaround with a free offline capture workflow and verify the final PNG.
Choose the Windows 11 method by the result you need
Snipping Tool is the shortest built-in route for a normal region, window, or full-screen image, but its static snip is not a dependable way to preserve the visible mouse pointer. If the pointer is irrelevant, use it and keep the workflow simple. If support needs a sequence of annotated actions and Steps Recorder is still present, it can document clicks, but Microsoft has deprecated it and recommends newer capture tools.
When one PNG must show the pointer, select Region, Window, or Display in UtiliVera Capture, enable Include cursor, and use a short delay for a menu or hover state. Put the pointer tip beside the target so it explains the action without covering the label. A pointer proves position, not that a click completed, so pair it with a caption or a follow-up frame when the outcome matters.
Choose the capture mode and timing
Select region, window, or display, then enable cursor inclusion explicitly. Some built-in screenshot shortcuts omit the pointer. For a menu or hover state, use a delay: start the capture, restore the state, place the pointer, and wait without moving it.
Keep display scaling stable and capture the smallest useful area. If several monitors use different scale factors, rehearse on the target display and verify that the pointer is not offset from the captured control.
Place the cursor without hiding the target
Move the pointer to the edge of a button or hotspot so its tip indicates the target while the label remains readable. Avoid text-selection cursors blinking inside content unless that state is part of the lesson.
For drag-and-drop documentation, capture a before frame, a movement frame, and the result rather than asking one still image to prove a sequence. A short GIF or video may communicate the motion better when the exact path matters.
- Choose the target display and scale
- Enable Include cursor
- Set a delay when needed
- Restore the menu or hover state
- Place the pointer beside the target
- Capture to a separate PNG
- Inspect pointer position and target text at 100%
Verify the final exported pixels
Open the result outside the capture app. Confirm that the pointer exists, is not duplicated, uses the intended Windows cursor, and remains aligned after cropping or resizing. Check high-contrast and large-pointer settings if accessibility documentation depends on them.
Remove personal notifications, filenames, and background windows before sharing. Keep the original capture and annotation project when later revisions may need a cursor-free version.
Product scope and reader verification
What the product audit covers—and what you must test
- Audited product capability
- Capture 0.6.0 exposes cursor inclusion for screenshots and recordings and stores the choice in its repeatable workflow. The public installer is available unsigned; Windows may show ‘Unknown publisher,’ and trusted signing will be added later.
- Task-level evidence status
- This article does not claim a frozen end-to-end run for this exact task. External-drive and duplex results depend on the real storage or scanner hardware; controlled or simulated evidence is labeled in the product audit.
- Important limits
- Cursor capture varies by Windows API, protected surfaces, remote desktops, games, hardware overlays, and multi-display scaling. A pointer position does not prove that a click occurred.
- Reproducible acceptance check
- Keep the source, record the settings, process a representative copy, compare expected and actual page/file counts, dimensions, content, metadata, and hashes where relevant, then scale only after the small test passes.
Open the independent product audit → · Inspect this article version →
Frequently asked questions
Why is the cursor missing from my screenshot?+
Many Windows shortcuts intentionally omit it. Use a capture mode with an explicit Include cursor option.
How do I capture a tooltip?+
Use a delay, restore the hover state, and keep the pointer still until capture.
Should tutorials always show the pointer?+
No. Include it only when position or interaction is part of the explanation.
Should I use Steps Recorder on Windows 11?+
Only as a temporary built-in workaround when it is still available and an annotated action sequence fits the task. Microsoft has deprecated Steps Recorder, so do not build a long-term workflow around it.
Official and primary sources
Sources were checked August 21, 2026. Product statements are limited to the frozen UtiliVera audit; external technical statements follow the linked official source. The source-check record is public below.
Continue the real workflow
Choose the next UtiliVera tool by task
UtiliVera Capture
Use a small verified test before the full job.
Review the current unsigned download, exact checksum, and Windows warning before installing.
View unsigned download details